SAFETYONE™ APP
User Guide

Login to the Mobile App
Mobile applications provide an easy way for organizations to capture data in the field from any Android or iOS device.
Mobile applications are configured on the administrator website resulting in a unique experience for each mobile app user.
Mobile applications provide an easy way for organizations to capture data in the field from any Android or iOS device.
Mobile applications are configured on the administrator website resulting in a unique experience for each mobile app user.
For this training, we will be using an Android mobile device.
To access the SafetyOne™ mobile app, your organization’s administrator must add employees they would like to have access, as a user, and assign each user to a project on the Admin website.
Once your administrator has added you as a user, you will receive a welcome email with a link to setup your password. Once you’ve completed the activation and setup of your password, you’re ready to start using the SafetyOne mobile app.
Download the SafetyOne app from the app store.
Once the mobile app has been downloaded to your device, click on the icon.
Enter your username and password.
If you forget your username or password, click the “Forgot Username” or “Forgot Password” link on the sign-in screen.
Once you login to the mobile app, the app will synchronize with the server for your user account.
This is a critical step that allows the mobile application to work offline.
Depending on the amount of content to be synchronized, this may take a minute.
When the synchronization is finished, if your organization has sent out any company news, a News screen will appear.
Click “Next ‘ in the top right corner to scroll through the news feed.
The news feed is an important tool to distribute information pertinent to the mobile app user. For example, you may see generic news items sent to all mobile app users in your organization or something specific like alerting you to inclement weather on your job site.
When complete, click “Done” in the top right corner. This will take you to the home screen.
Working Offline in the Mobile App
One of the most powerful features within the SafetyOne™ mobile app is the ability to work offline. Perform observations, mobile forms and toolbox talks even when you are not connected to the internet through cellular service or a WiFi connection.
One of the most powerful features within the SafetyOne™ mobile app is the ability to work offline. Perform observations, mobile forms and toolbox talks even when you are not connected to the internet through cellular service or a WiFi connection.
This is the reason why, when you first log into the mobile app, there is a spinner that sometimes takes a bit to load. It’s loading all of the required information so you can immediately start to work offline.
The only modules that may not work offline are Policies and the File Cabinet. If any of the documents in these modules have been opened previously on your mobile device, then, while offline, you will be able to open the version of these documents that were previously opened.
If you try to open these documents for the first time offline, a message will be displayed that “A problem occurred while downloading your file.”
You will need to download this file once you are back online.
When you are offline, you will notice that there is an animated juggler over images. This alerts you that the information is being synched or will be synched, once an internet connection is reestablished.
You will also notice in the top left corner a Synch Manager icon. Click on this icon at any time in order to see what information has not yet synched to the server.
Observations in the Mobile App
Observations provide a way for mobile app users to audit workplace safety by responding to a set of specific questions, adding relevant documentation such as photos and notes, and assigning issues to internal and/or external parties.
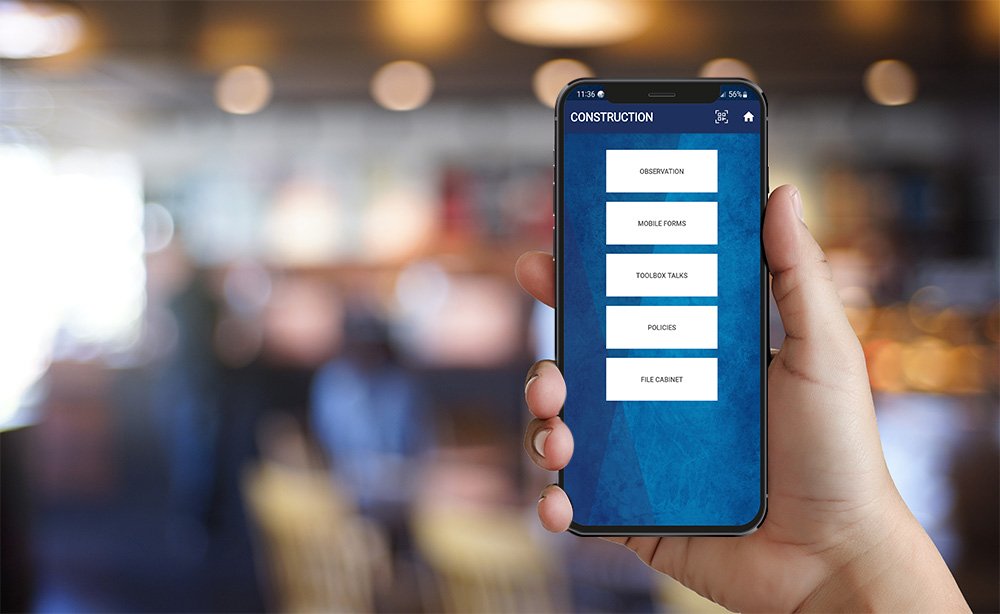
To create an observation, start from the main menu in the mobile app.
If you are not on the Main Menu, click the home icon in the top right corner of the app screen and it will take you to the Main Menu.
Since Observations can be configured differently for each Project, start by tapping the “Projects” icon.
You will see a list of the Projects that have been assigned to you.
Projects are created and assigned to users from the administrator website. If you do not see your Project listed here, please contact your Administrator. They may need to either create the Project or assign the project to you.
Tap the Project and then tap on the “Observation” button.
Tap “Edit” to continue working on an observation you’ve already started. Or, tap “New” to start a new Observation.
At the top of the observation screen, there is a “General Note” button. This is an open note field that you can use to provide context for the observation.
For example, you may note what was occurring in the workplace, weather conditions, etc.
When a General Note is entered, a date and time stamp is added along with your name. Multiple General Notes may be added to an observation report.
There is also an option to select the “Party Observed” that would apply to the entire Observation report. This will allow you to document a person or company being observed. You also have the option to document a specific Party Observed on each identified issue.
At the top of the observation, there is an optional field for your administrator to label and use however your organization sees fit.
In this example, we’ve labeled it “Wildcard Custom Field,” but your organization can name it anything they would like and the content will display on your observation report.
For example, the field could be used to identify a specific crew, building location on a large project, or anything else your organization needs to track.
The app will list the observation Categories that have been enabled for this Project by your administrator. Use the “Search” field to type a keyword, or scroll down the list. Then, tap on an Observation category in the list.
The app will open a list of questions within the selected Category.
From the question list, swipe right to document a positive, “yes,” response to the question. Swipe left to answer a negative, “no,” to the question.
Tap the question to document the details.
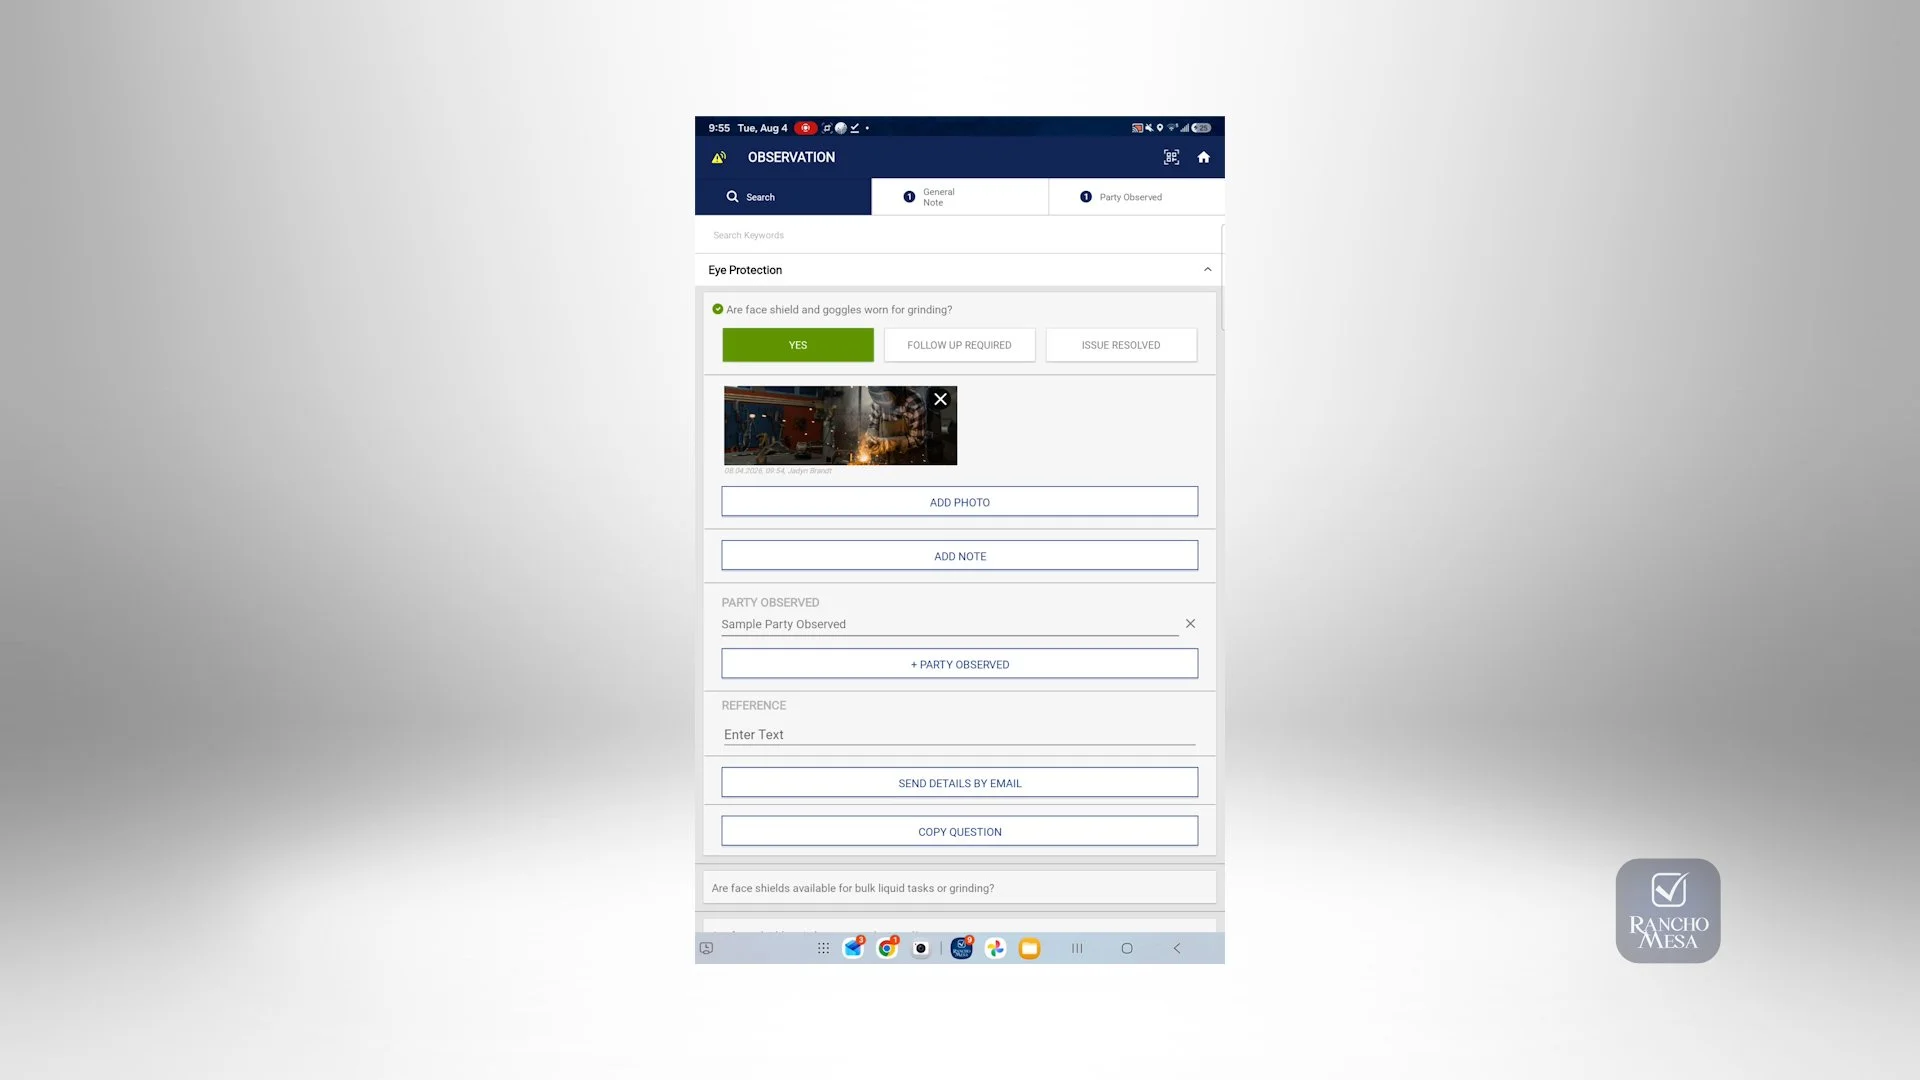
Once the question expands, you will see three options. Answering “Yes” to the question implies that the risk is mitigated. “Follow Up Required” means that an issue has been identified based on the very specific risk noted in the question. Finally, “Issue Resolved” means that an issue had been identified and is now resolved.
Depending on the answer to the question, different fields will display for each question.
First, when a question is answered with “yes,” you will be able to upload photos using the “Add Photo” button.
You can either take a photo from your mobile device or upload a photo from your library. When a photo is added, it will be noted with your name, the date, and time that the photo was uploaded.
To add a note, click “Add Note.” You have a choice of either typing in a note or using the voice dictation software on your device.
Similar to the Party Observed button at the top of the report, this button allows you to indicate the name of the person or company being observed on this specific question. If your administrator uploaded a list of Parties Observed on the administrator website, a dropdown will allow you to choose from a list of Parties Observed.
The Reference field allows companies to input specific text that is applicable to the observation. This could refer to a column line or an area of the facility, a room number, etc.
Finally, there is a button that allows you to send this specific question and its details to someone via email by tapping the “Send Details By Email” button.
Using the email client that is setup on your device, an email will open with a real-time link, meaning that whenever anyone opens this link, they will always be provided with the most current status of the risk including all the photos, and notes that have been documented. By providing a link instead of a pdf, the recipient will always have access to a real-time status of the issue.
Use the “Copy Question” button to duplicate the question in the report. This allows you to document multiple instances of a risk. For example, you could have two separate locations on a job site where a risk was mitigated in one location and not mitigated in the other. Both instances can be documented separately with the Reference field identifying exactly where each risk is located.
Now, if you answer the question with “Follow Up Required,” you will be asked to choose a Severity. There are three choices: Low Severity, Medium Severity and High Severity.
You can also choose a “due date” for correcting the issue. This field is particularly important if you assign the issue to someone else to correct.
Just like with mitigated risks, you’ll be able to upload photos, make notes and identify the party observed.
Since you have identified an issue, you can document how the issue was mitigated using the “Add Corrective Action” button.
If you can’t mitigate the issue, you can assign this issue to someone else either within your organization or outside of the organization.
To assign an issue to someone within the organization who is also an app user, click “Assign Internal Employee.”
You will then choose from a list of active users in your organization, and multiple users may be chosen. The app will display all of the users on the question screen with the time and date that they were assigned the issue.
The assigned user will be sent a push notification to their mobile device notifying them they have been assigned the issue. The user will see that the status of the issue has been changed to “Pending Review.”
The user who has been assigned the issue will then be able to tap into the question from their mobile app. They can change the status, add photos, add notes and add a Corrective Action.
Then, they will click “Submit for Approval.”
You can also assign issues to people who are not app users. This is done by sending the question and details to people using their email address.
To assign a non-app user, click the “Assign External Worker” button. The app will then access the device’s contacts. Click the contact that you want to assign the issue to by clicking the checkbox to the right of their name.
Click the “Assign Issue” button at the bottom. External people will then be listed in the Assigned list on the question screen with an “(Ext)” next to their name.
When the external party opens the link via their email, they will be required to fill out their first name, last name, company name and email address. This information will display on your assignee list.
Once the internal employee or external workers has addressed the issue and documented it, you will be notified via a push notification that additional information has been submitted and the status of the issue will have changed to “Pending Approval.”
At any time, you can access all your open issues from the “Open Issues” icon on the Main Menu.
If you are satisfied that the issue has been resolved, you can change the status to “Issue Resolved.” You are then required to add a “Corrective Action” to close out the issue, if one has not already been entered.
In this last scenario, if you have identified an issue and the issue is resolved immediately, your answer will be “Issue Resolved.” Selecting this answer will require you to click the “Add Corrective Action” button and document how the issue was fixed in order to proceed. It is a best practice to document the issue and the corrective action to ensure the underlying issue is properly tracked within the platform analytics.
You should then continue answering questions until the Observation is complete.
Note: unanswered questions are considered “Not Applicable.” Your organization’s administrator can decide if unanswered questions will or will not be included on the final observation report.
From the Observation Category List, you are also able to complete additional observation reports by opening a new category.
At the bottom of the Observation, you have the option to add your signature. To do this, tap the “Signature” button.
Type in your name in the “Enter Name” field, along with your employee ID number. Once you have typed your name the first time, the app will remember it each time you begin to type your name. Then, sign using your finger or a stylist. Tap the “Done” button.
You have the ability to send the Observation Report via email. To do this, tap “Send Email” and the app will generate a real-time link in an email.
Tap the “Finished” button. This will send your observation report to the cloud and will be available on the administrator website. You will then see a list of all of your completed Observation reports.

Open Issue in Mobile App
You can view all of your Open Issues at any time on the mobile app.
You can view all of your Open Issues at any time on the mobile app.
Click the home icon in the top right corner of any of the mobile screens to access the Main Menu. Then, click the Open Issues icon.
The Open Issues screen displays both “My Open Issues” and “Assigned Issues.”
“My Open Issues” are issues identified and created by you but have not been resolved. There are three filters on the top of the screen which allow you to filter by Project, Status and Severity.
Once the filters are chosen, a list of all of the Open Issues are displayed.
The list can be sorted by Date by clicking on the arrow to the right of the Created Date column label.
You’ll see a “P” icon showing the issue is pending review and has not been corrected by the assigned user. An “A” means the issue has been corrected but is pending your approval. And an “X” means that the issue has not been assigned to anyone.
Once the assigned user has addressed the issue and submitted their correction for review, click on the question to open the Observation and review the details of the open issue, review their corrections and click “Issue Resolved.” Then, click “Finished.” They’ll see that the issue has been removed from their “Assigned Issues” list.
“Assigned Issues” are issues that have been assigned to you by another user.
To view the “Assigned Issues,” click on the “Assigned Issues” tab. You can now Filter by Project, Status and Severity. Click into any of the questions below to open the Observation and review the details.
Add a photo, note, and corrective action, then click “Submit for Approval.” This will notify the user who assigned you the issue that it has been corrected and requires their review.
Combined Observations in Mobile App
Combined observations provide a way for organizations to combine multiple observations into a single report. This is useful when users want to combine various reports into a single report rather than sending off multiple reports.
Combined observations provide a way for organizations to combine multiple observations into a single report. This is useful when users want to combine various reports into a single report rather than sending off multiple reports.
To create a combined observation, click on the Home icon in the top right corner of any mobile app screen.
Then, click on the “Combined Observations” icon.
Use the dropdown options at the top of the screen to filter the list of observations.
Leave the filters blank to see a list of all the Observations you’ve created.
Click the box next to each observation you would like to combine.
When done, click the “Combine Observations” button at the bottom.
When you combine observations, you can also break down the observations by specific “Party Observed.” Party Observed is an optional field that organizations can input when a question is answered in an observation.
It could be the name of the person who is being observed, a trade, or a contractor name.
To combine observations for a specific party observed, use the pull down to choose from the list.
To combine observations for all parties observed, leave the dropdown field blank.
You also have the option to add a Title to the Combined Observation Report at the top of the screen. If you do not want to add a title, leave the field blank.
When complete, click the “Done” button. This will send the report to the Administrator website.
You also have the option to email the report to an individual by clicking on the “Email Report” button. You may get a pop-up with email options. Select the email you’d like to send from. The email will open with a link to the combined report. Enter in the email address for the recipient, and hit send.
Sending the report as a URL link in the email ensures the recipient will be able to access the most up to date information at any time.

Mobile Forms in the Mobile App
Using mobile forms provides a way for organizations to collect and manage data right from their mobile devices.
Using mobile forms provides a way for organizations to collect and manage data right from their mobile devices.
There is a library of mobile forms available for use within the SafetyOne™ platform, such as: Automobile Accident Reports, Incident Reports, and many others.
Your administrator will decide which mobile forms you will have access to in the mobile app, by assigning them to the applicable projects.
To access mobile forms, click “Projects,” then choose your project.
Click “Mobile Forms.” Then, click “New.”
The app will display a list of all the mobile forms that are assigned to that project.
For this example, we will choose our “Daily Report (Sample)” form. However, all the mobile forms work the same way.
Note, your device may ask to track your location. If you choose “Yes” then this will allow forms to be tagged with GPS coordinates and will assist when filling out certain fields such as an address within the mobile forms.
When a form field has red text, it means that it is required. Mobile forms cannot be saved unless all the required fields are filled out.
The report title will automatically populate using the name of the mobile form and today’s date. If you would like to change the title to something else, click on the text and replace it.
When there is a date field, you can use the calendar function to easily select the date. The calendar can also be used to quickly pick another year by clicking the year button on the calendar.
When the form was created, headers were used to organize the form into different sections. To expand each section, click on the headers.
Forms can also contain “Notes.” Next to the “Employee’s Name” field you will notice a question mark in a circle.
This indicates that there is a note associated with the field. Clicking on the note icon will provide you with information designed to help you fill out the field.
For this section of the mobile form, we have included a timecard. This timecard allows you to input multiple employee’s time for the day.
After filling out an employee’s name, employee ID, employee trade, start and end times, click the “Add Employee” button to add another employee’s timecard.
Mobile forms also allow for multi-selection pulldowns. Click “Weather Conditions.” From this list, you can choose multiple options. Click on the arrow when done with your selections.
When mobile forms have a button for “Add New Photo,” the user has the option to either take a photo with their mobile device or upload photos from the device’s library.
To attach multiple photos, click all photos to be uploaded. Keep in mind only ten images may be uploaded at once.
When a “Set Location” button exists within a form, the app will automatically find your location using GPS (if allowed).
You can also type in the address by entering it in the text field on the top of the map.
Some mobile forms have logic built-in to help guide you through answering only relevant questions.
When you expand the Safety Recap header, you will see the question, “Was anyone injured on site today?” If you choose “Yes,” additional fields will appear. This is called a nested option field.
You can also add sketches to forms when a photo is not available or a quick diagram is preferred. Click “Add Sketch.” Give the sketch a title and begin to draw. Click “Done” when you are finished.
You can also sign forms. Click, “Add Signature.”
Type in your name in the text box. We highly recommend including your Employee ID after your name to ensure it is very clear who signed it, especially if you have multiple employees with the same or similar names. Then, add your signature in the box below your name. Once you have typed your name in the text field once, the app will use predictive typing to complete your name subsequent times.
You may also attach files to a mobile form. These may be Word documents, PDFs, .mp4 video files, Excel spreadsheets or PowerPoint presentations.
Finally, you can send this form to someone via email by clicking the “Send Email” button at the bottom of the form, or click “Submit” to complete the form. The form will then be available for supervisors and administrators to view on the administrator website.
Copy A Mobile Form in the Mobile App
Did you know that you can copy mobile form reports once they are created on the mobile device? This is useful when there are mobile forms within your organization that are slightly changed from one day to the next and you want to update the previous day’s form information.
Did you know that you can copy mobile form reports once they are created on the mobile device? This is useful when there are mobile forms within your organization that are slightly changed from one day to the next and you want to update the previous day’s form information.
For example, you may want to copy a daily report from the previous day and then update some of the fields and save the new form with a new name.
To copy a previous mobile form and all of its previous information, click on your project, click “Mobile Forms,” then click “Edit.”
You will see a list of all mobile forms that you have previously created.
To find the mobile form to be copied, either use the search field or scroll through the list and find the mobile form. Then, click the copy icon on the right side of the form.
The app will ask, “Do you wish to copy this mobile report?” Click, “OK.”
You will then be taken into the copied mobile form.
You should give the report title a revised name. To change the name, overwrite the “Report Title” field.
When complete, click “Submit” at the bottom of the form.
You will then be taken back to the mobile forms list where both of the reports are now listed.

Toolbox Talks in Mobile App
Performing toolbox talks through the SafetyOne™ mobile app is easy, and includes many features to help document these meetings in the field.
Performing toolbox talks through the SafetyOne™ mobile app is easy, and includes many features to help document these meetings in the field.
To perform a Toolbox Talk, click the Projects icon, click on your Project, click “Toolbox Talks,” then click “New.”
The app will now display a list of toolbox talks that have been assigned to this project by your organization’s administrator.
Use the search field to find topics by a keyword or scroll through the list to pick a topic. Click the topic. The app will open the toolbox talk details.
Each of the four sections of the toolbox talk should be expanded to guide you through the toolbox talk. A best practice is to stop periodically and ask your crew questions about the toolbox talk to ensure they are engaged.
Towards the bottom of the toolbox talk, organizations can add a note by clicking “Add Note.”
Organizations use the note section to annotate the toolbox talk with discussions made during the meeting or anything specific you want to document. These notes can either be input by voice dictation or via keyboard. After each note is added, the date and time stamp as well as the user’s name who added the note is documented.
Some organizations will take a photo of the crew participating in the toolbox talk.
To add a photo, click on the “Add Photo” button and choose the camera option, take the photo and click “Use Photo.”
Organizations are also able to gather signatures from toolbox talk participants electronically. To do this, click “Add Signature,” type your name and employee ID number (if applicable), then use your finger to sign the signature pad on the mobile device.
Once a person types in their name for the first time on a specific mobile device, the device will remember the name (unless you have logged out) to make it easier to type in names in the future. Use an employee ID after the employee’s name to ensure individual employees with the same or similar names can easily be identified.
Then use your finger to sign the signature pad on the mobile device.
Then, click “Done.”
To add in multiple signatures, click “Add Signature” again and follow the same steps.
You can also have others follow along and complete their signature on their own device. To do this, click on “Invite Others” at the bottom of the screen. A QR Code will pop up. Any other employee with a device that has a camera, can scan the QR Code and follow along on their device, as well as add their signature to show they participated in the Toolbox Talk.
Organizations can email a copy of the completed toolbox talk report directly from their device. Click “Send Email” and the app will use the device’s existing email settings to send the toolbox talk report. The email will contain a link to the completed toolbox talk report. This link will always contain the most current information from the toolbox talk. So, if additional names are added later, the link will always have the most current information.
Lastly, click “Finished.” This will send the data back to your organization’s database, where your administrator will be able to access the report.

Policies in the Mobile App
Your organization can make company policies accessible on any mobile device through the SafetyOne™ app.
Your organization can make company policies accessible on any mobile device through the SafetyOne™ app.
Once the policies are uploaded and assigned to a project by the administrator, users assigned to that project can access the policies from their mobile device.
To open a policy, click on the “Projects” icon, select the project you wish to access, then click “Policies.”
Then, search for documents by using keywords in the search box or scroll through the list and click on the Policy you want to open.
When you click on a file, it may show “Downloading File” or have a loading spinner while it retrieves the document for the first time.
If the user previously opened a policy document while online, then this document will also be available to be viewed offline. If the user is offline, then they must connect to the internet first to view the document.

File Cabinet in Mobile App
The mobile file cabinet allows users to access a library of PDF documents that have been uploaded via the administrator’s website.
The mobile file cabinet allows users to access a library of PDF documents that have been uploaded via the administrator’s website.
These files can be viewed offline after they have previously been opened on the device.
To view files in the file cabinet, click on the “Projects” icon and select the project you want to access. Then, click on the “File Cabinet” button. Click on the folder in the list you wish to access.
You will see a list of files available to you in the folder for this specific project.
Keep in mind that only files that have been uploaded for this specific project are available when opening the file cabinet for the project, unless the files are not associated with a specific project and should be available to all mobile app users.
Depending on your internet speed, you may see a “downloading file” message appear while the file is being downloaded.
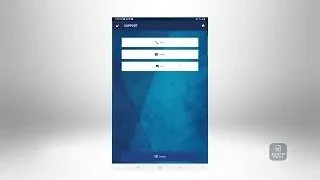
Support in Mobile App
To access customer support for the SafetyOne™ Mobile App, navigate to the Main Menu in the app, or click on the home icon in the top right corner of any screen.
To access customer support for the SafetyOne™ Mobile App, navigate to the Main Menu in the app, or click on the home icon in the top right corner of any screen.
Click on the “Support” button.
You can call or send an email to our support team.
There is also a Frequently Asked Questions library you can review, if you have questions.
Typically, you will not need to logout of the SafetyOne Mobile App when you are finished using it for the day. Simply close the app when finished. The next time you launch the app, it will be ready to use and you won’t need to login. However, if you are using a shared device, you will want to logout.
To logout of the SafetyOne Mobile App, click on the Logout button. This would require you to log back in the next time you launch the app.